Constructing Sand and Water Play Areas
I wanted to highlight the construction of water and sand play features today, using three great examples. One from the Playscape at Opal School in Portland, a project that Learning Landscapes is working on. Another from Mass Audubon’s Boston Nature Center in Mattapan, as featured on the Playscapes Blog. And finally, one from the Cleveland Zoo’s new Discovery Ridge Exhibit also designed by Learning Landscapes.
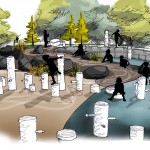
Opal School: Water Area
Learning Landscapes has been working with the Opal school over the last year to plan and implement a school ground overhaul. The goals include moving from significant asphalt and steep lawn to a more engaging and hands-on learning and play space for students. Here is the overall plan with all the features. You will see the water area near the top right. 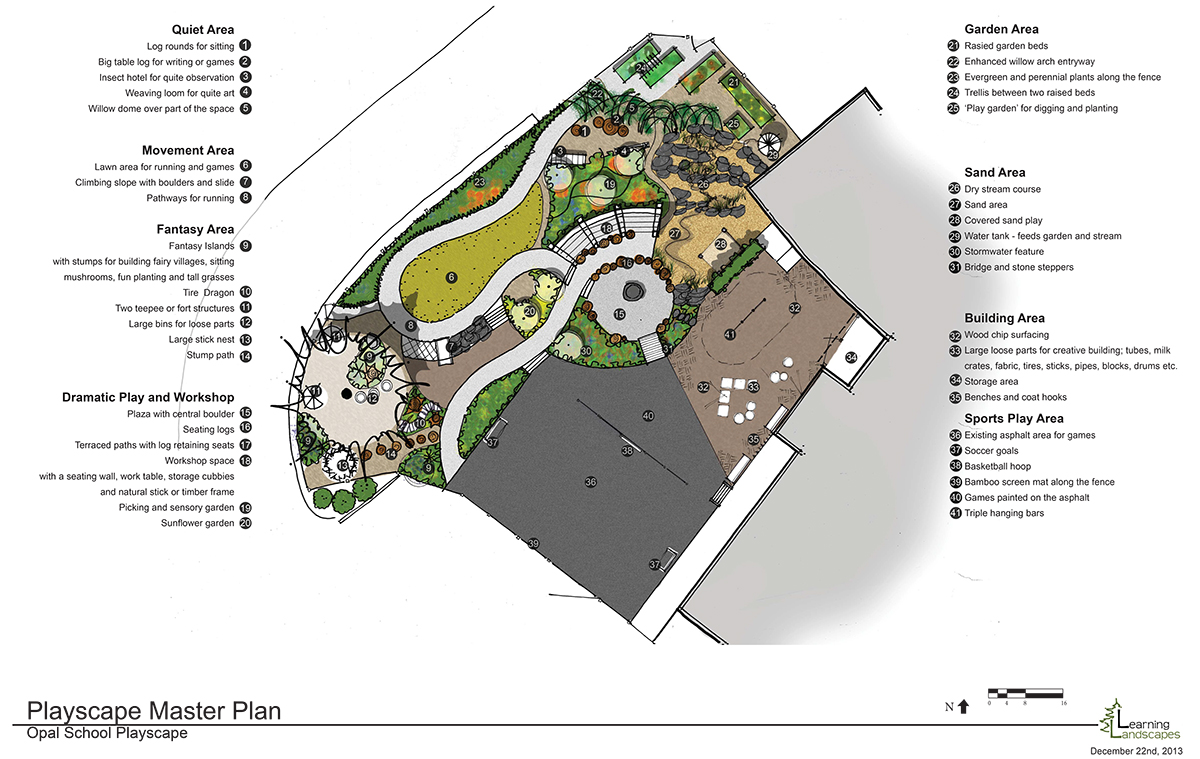
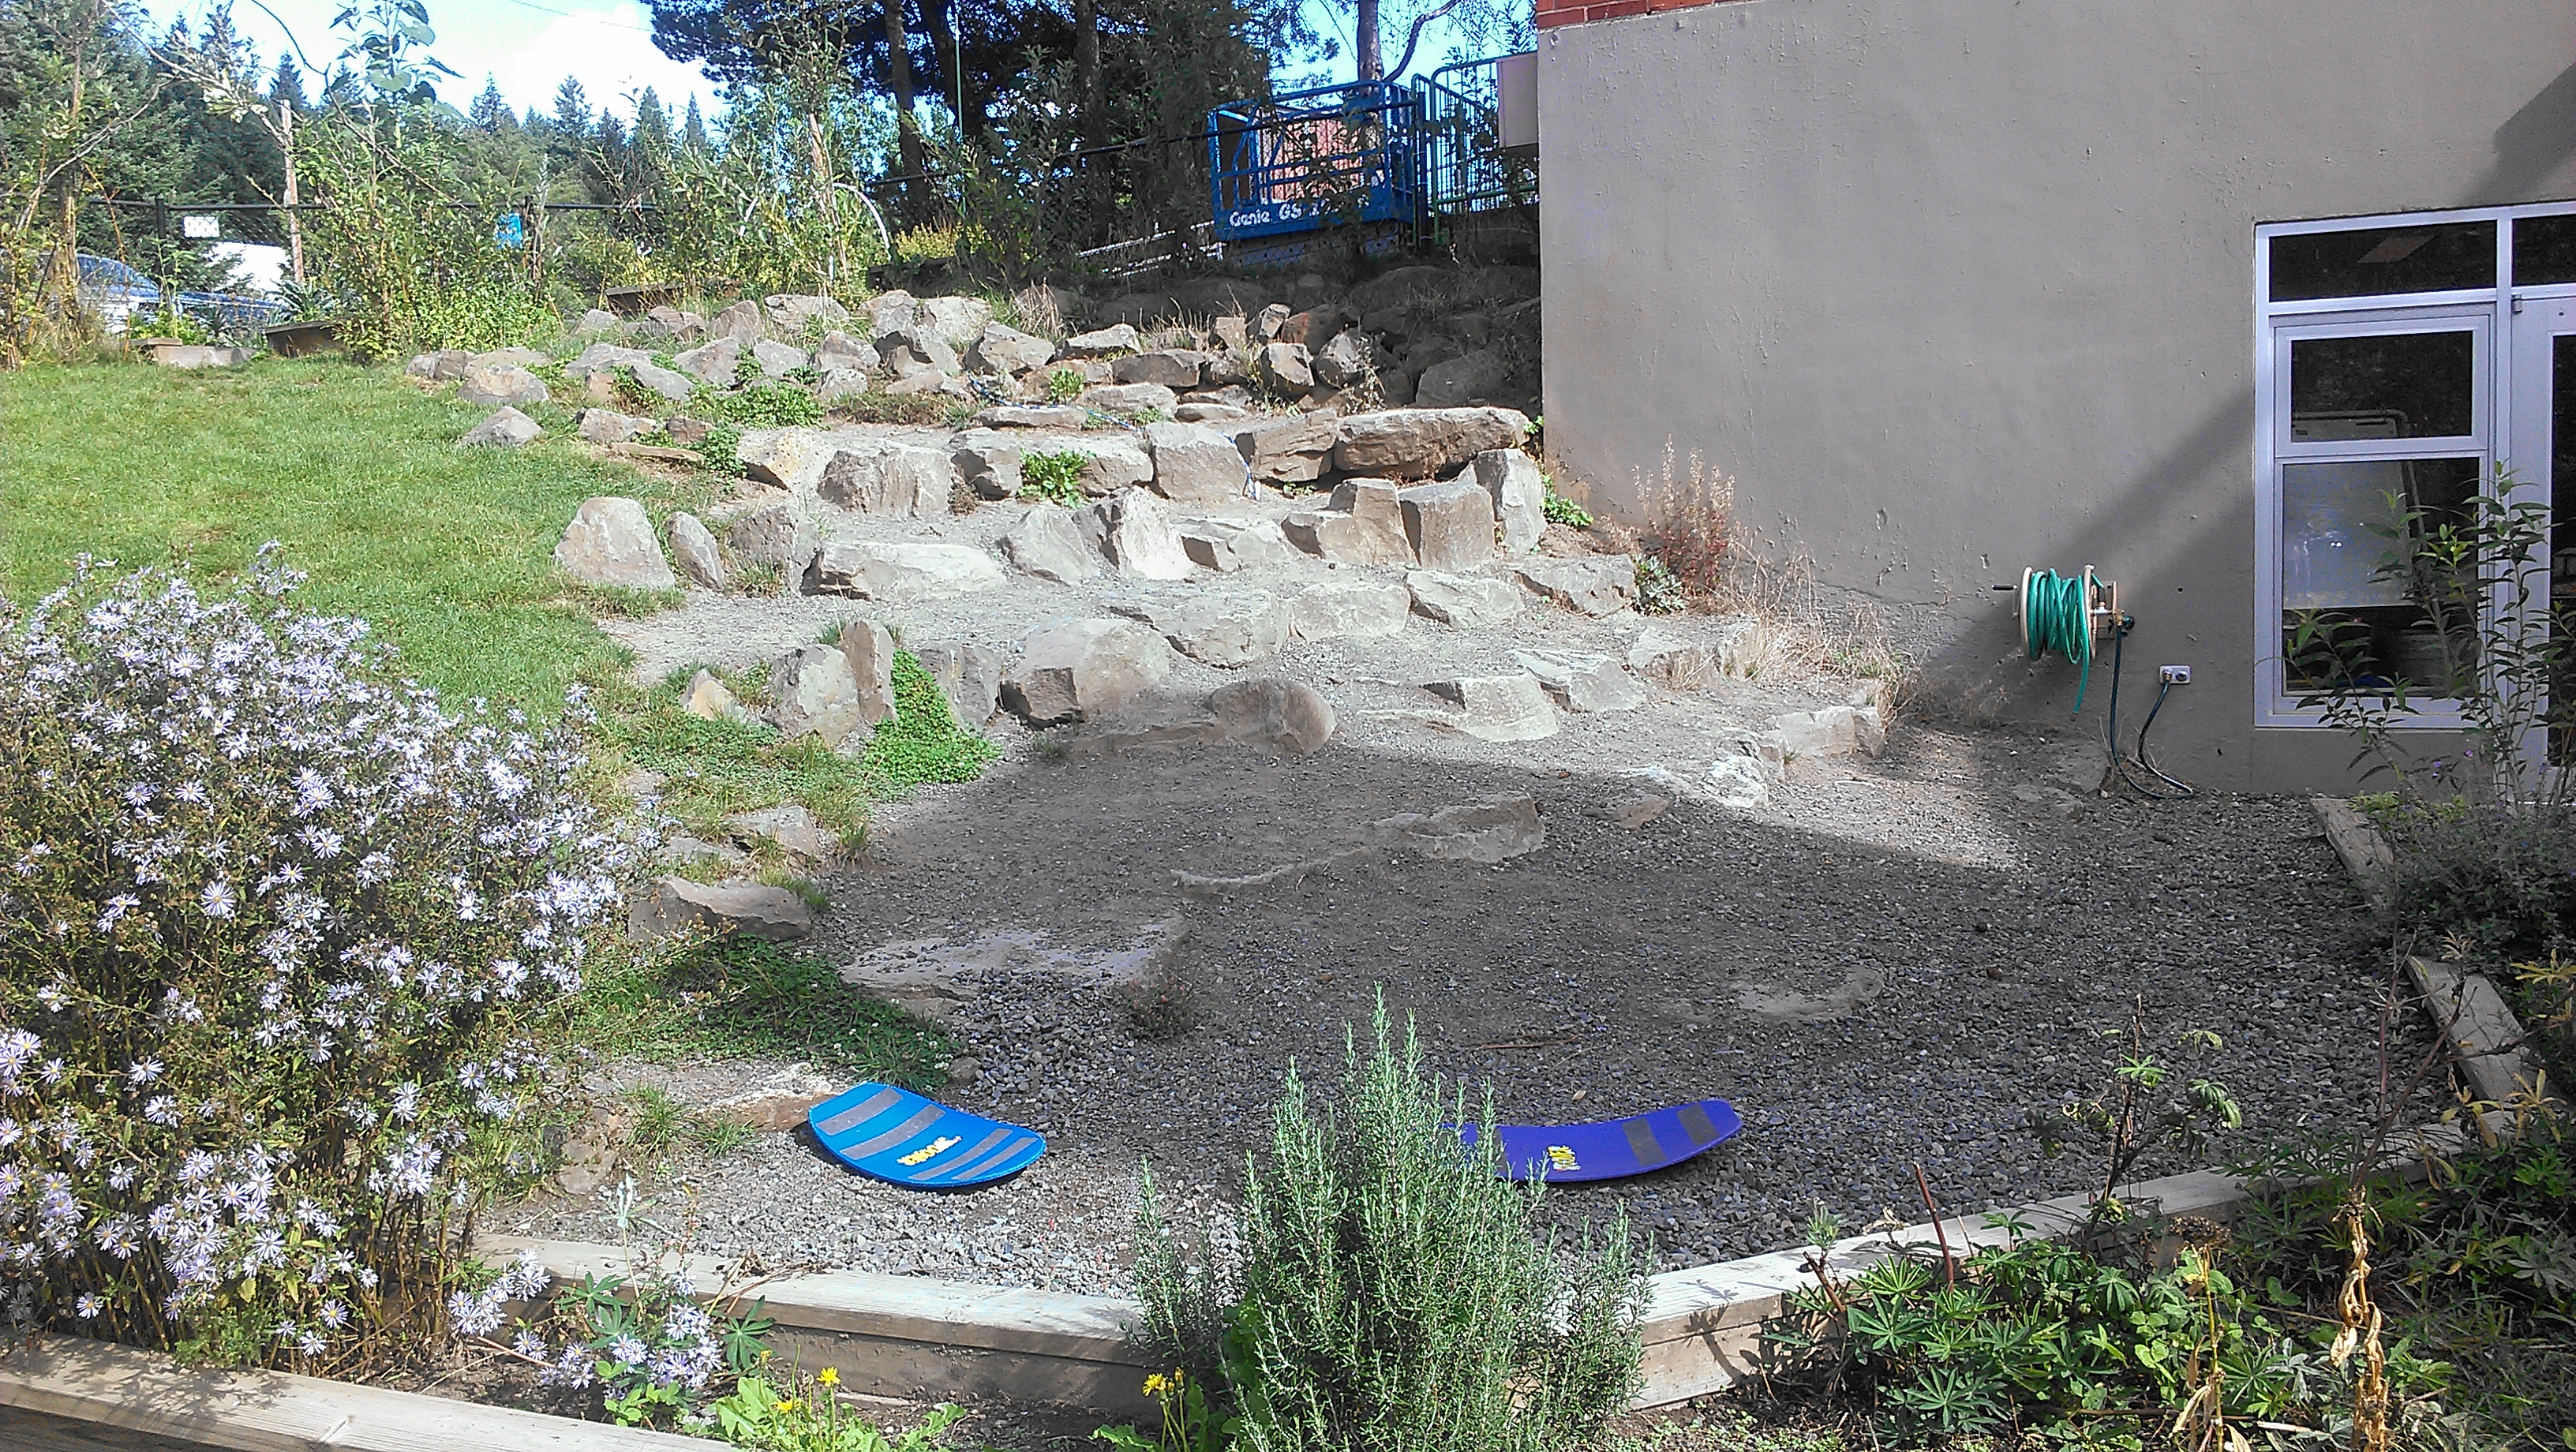
Before we started the area was steep and rocky. It was really too steep for much playing.
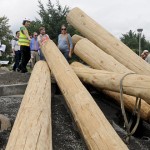
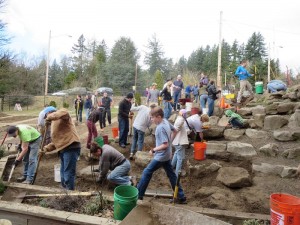
For the big volunteer day, school staff prepped the tools and materials (and doughnuts) and Learning Landscapes staff led a volunteer day to transform the space. Here is what we did.
The Big Volunteer Day
We charted out the path that we wanted the water to follow. It was spray painted on the ground so everyone could get the idea and work around it. We moved boulders to facilitate the water channel and keep water from flowing out of the area completely. Then we dug out dirt in order to make the channel and create a large sand area at the bottom of the feature.
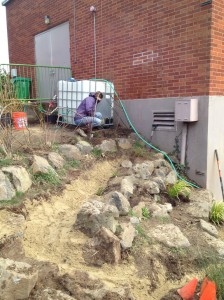
The water tank was added at the top of the channel to supply water to the feature. Teachers fill the tank with the hose and kids can open it and use the water as they like. When the water is gone for the day, it is gone — A little lesson in water conservation. At the end of the feature the water infiltrates into the large sand play area. Once the entire playscape is completed it will flow into a depressed planter and infiltrate over a larger area along with the stormwater on site.
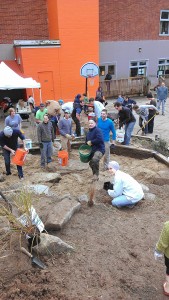
Next we brought in sand by the bucket full to refill the new channel and digging area.
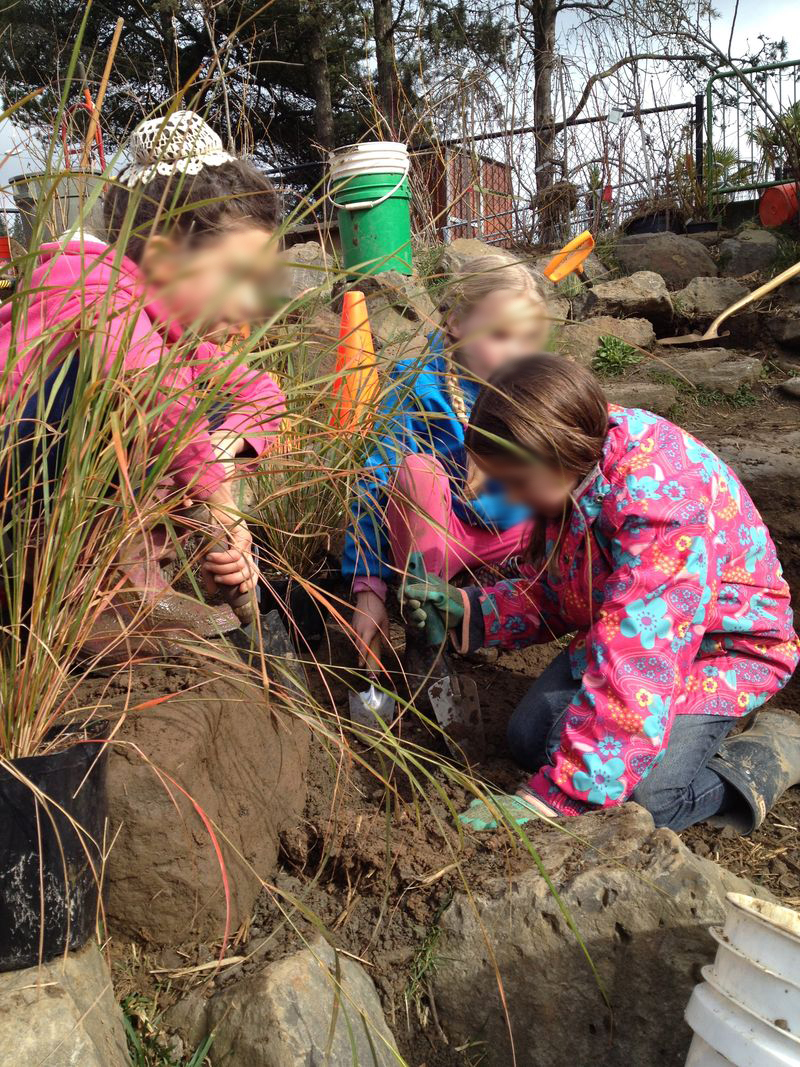
The kids helped plant grasses and other plants to create a more natural setting.
You can see the whole thing here in 30 seconds!
The kids wasted no time and started playing right away!

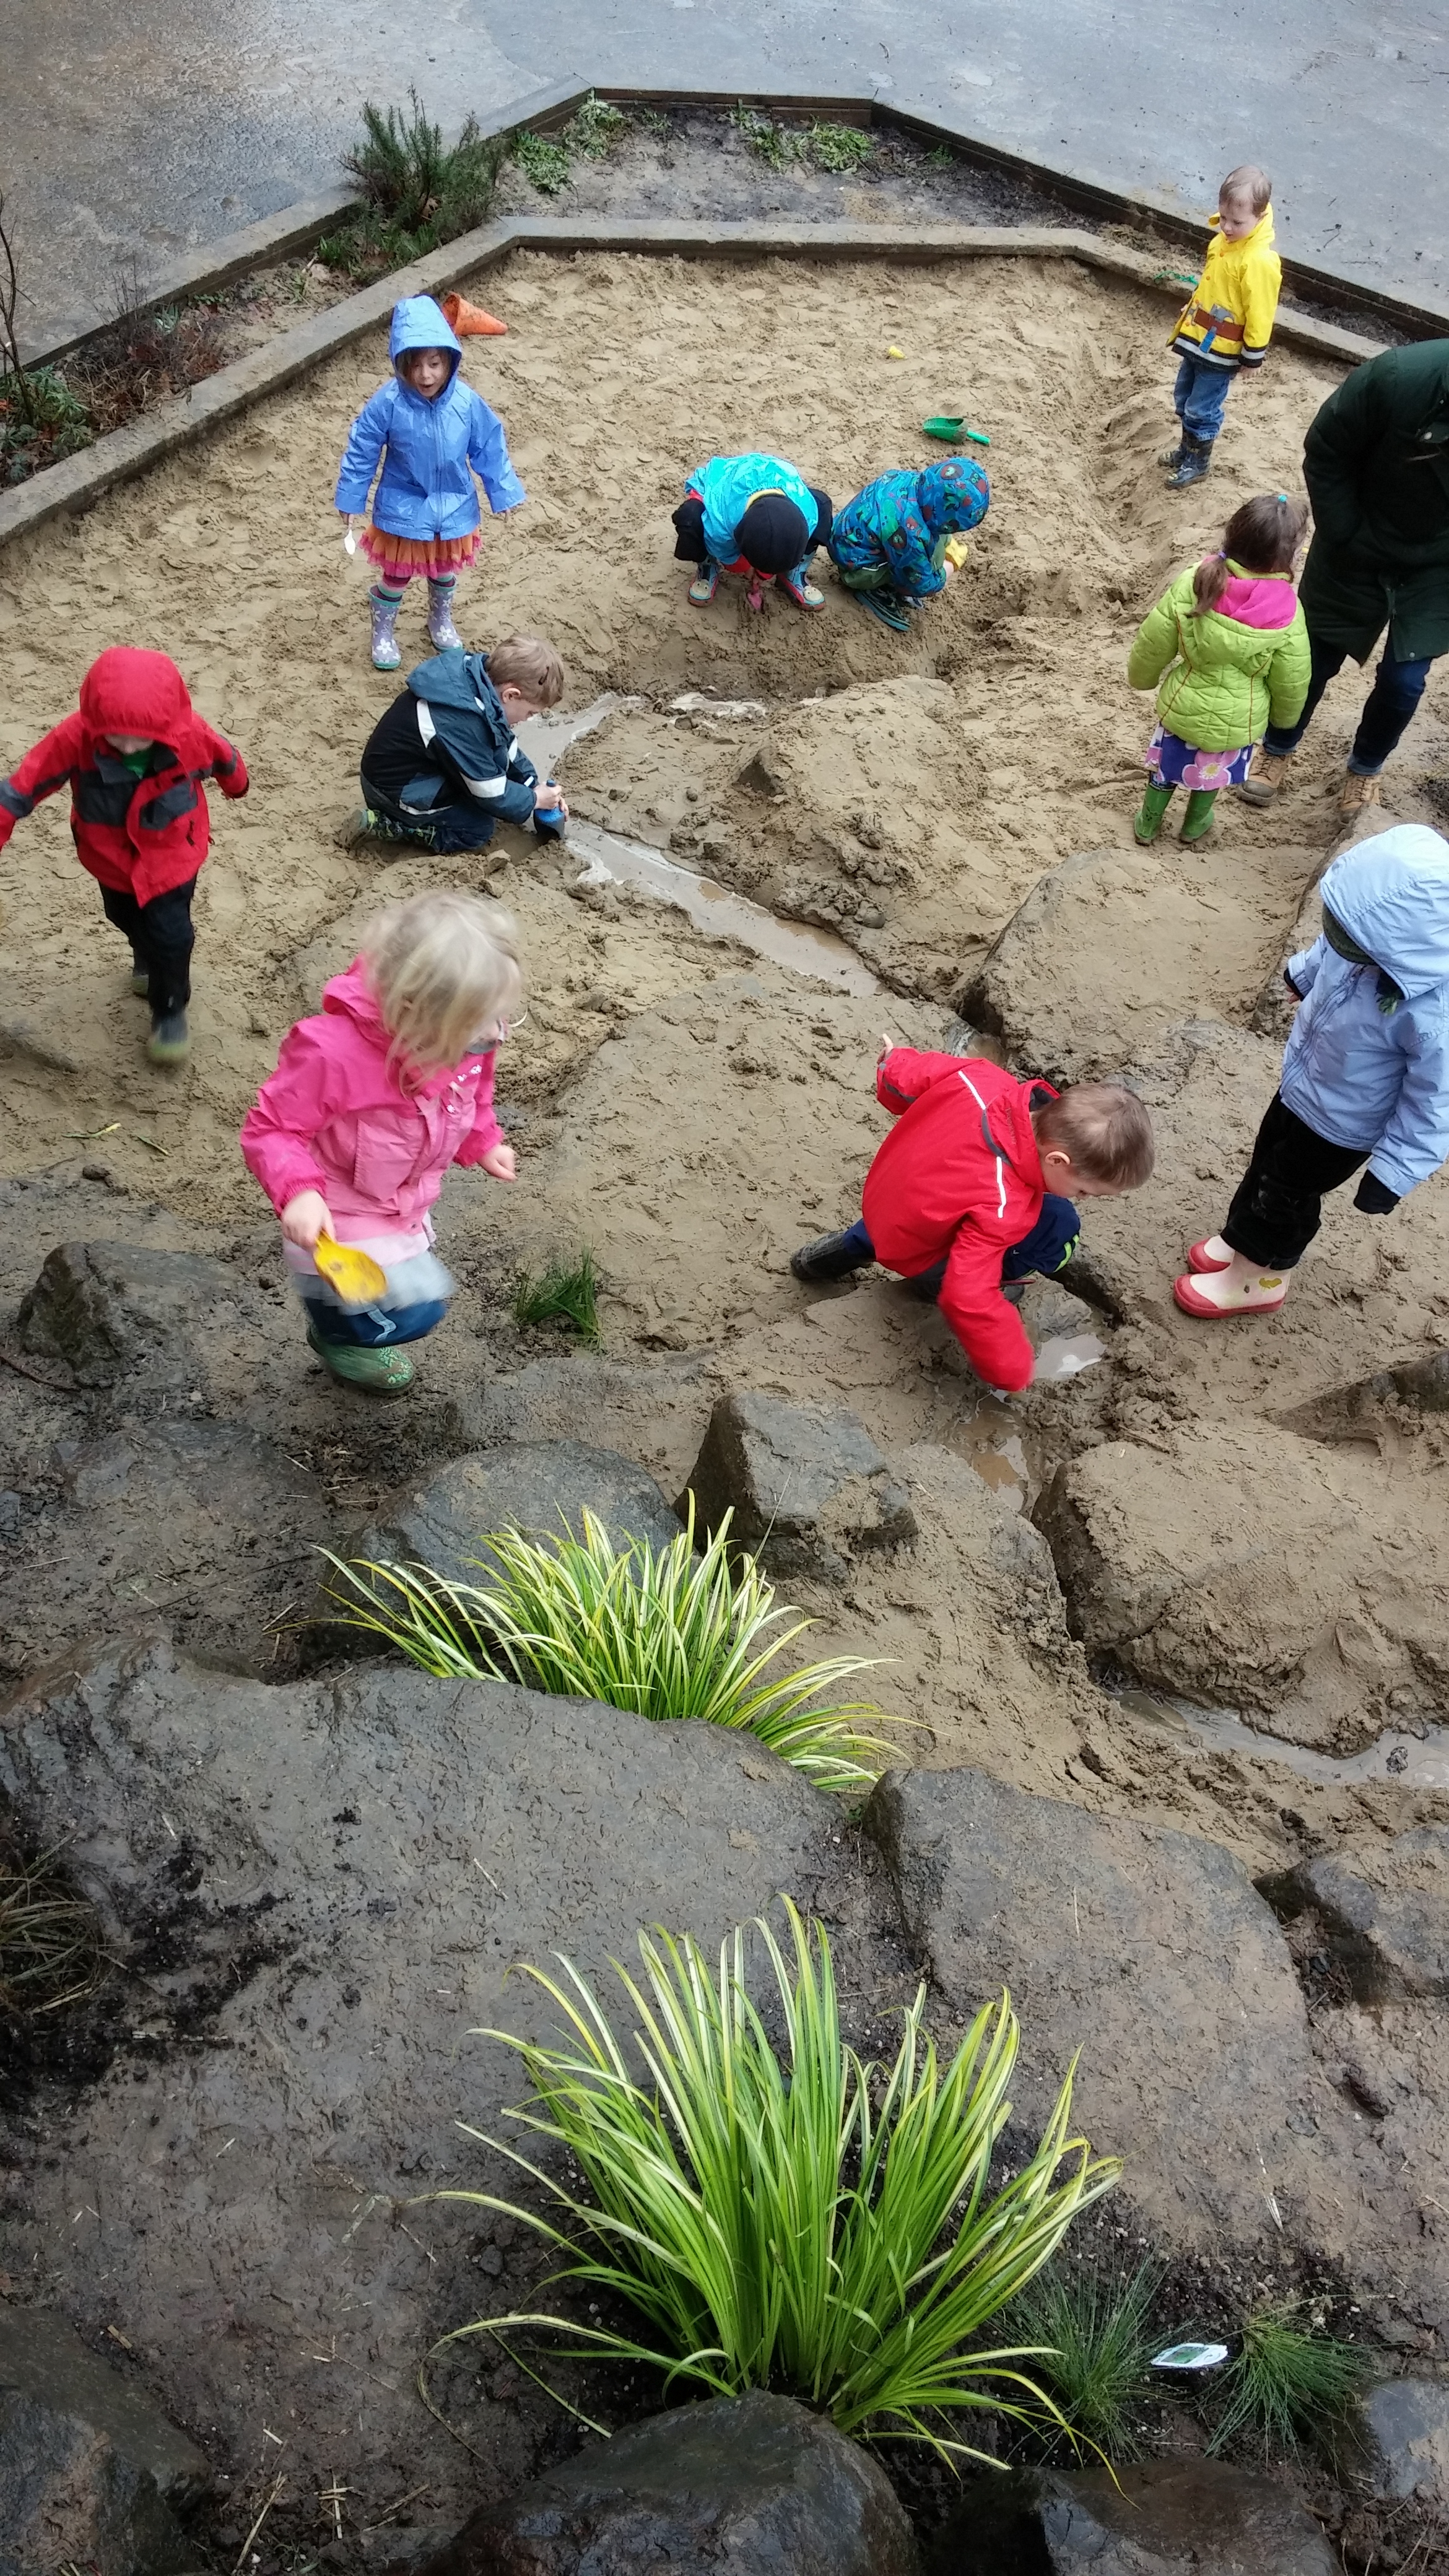
Lessons Learned
We had lots of volunteers and no one person got burnt out even though it was a lot of physical labor. We found as a result, that next time we asked people to volunteer they wanted to do it again!
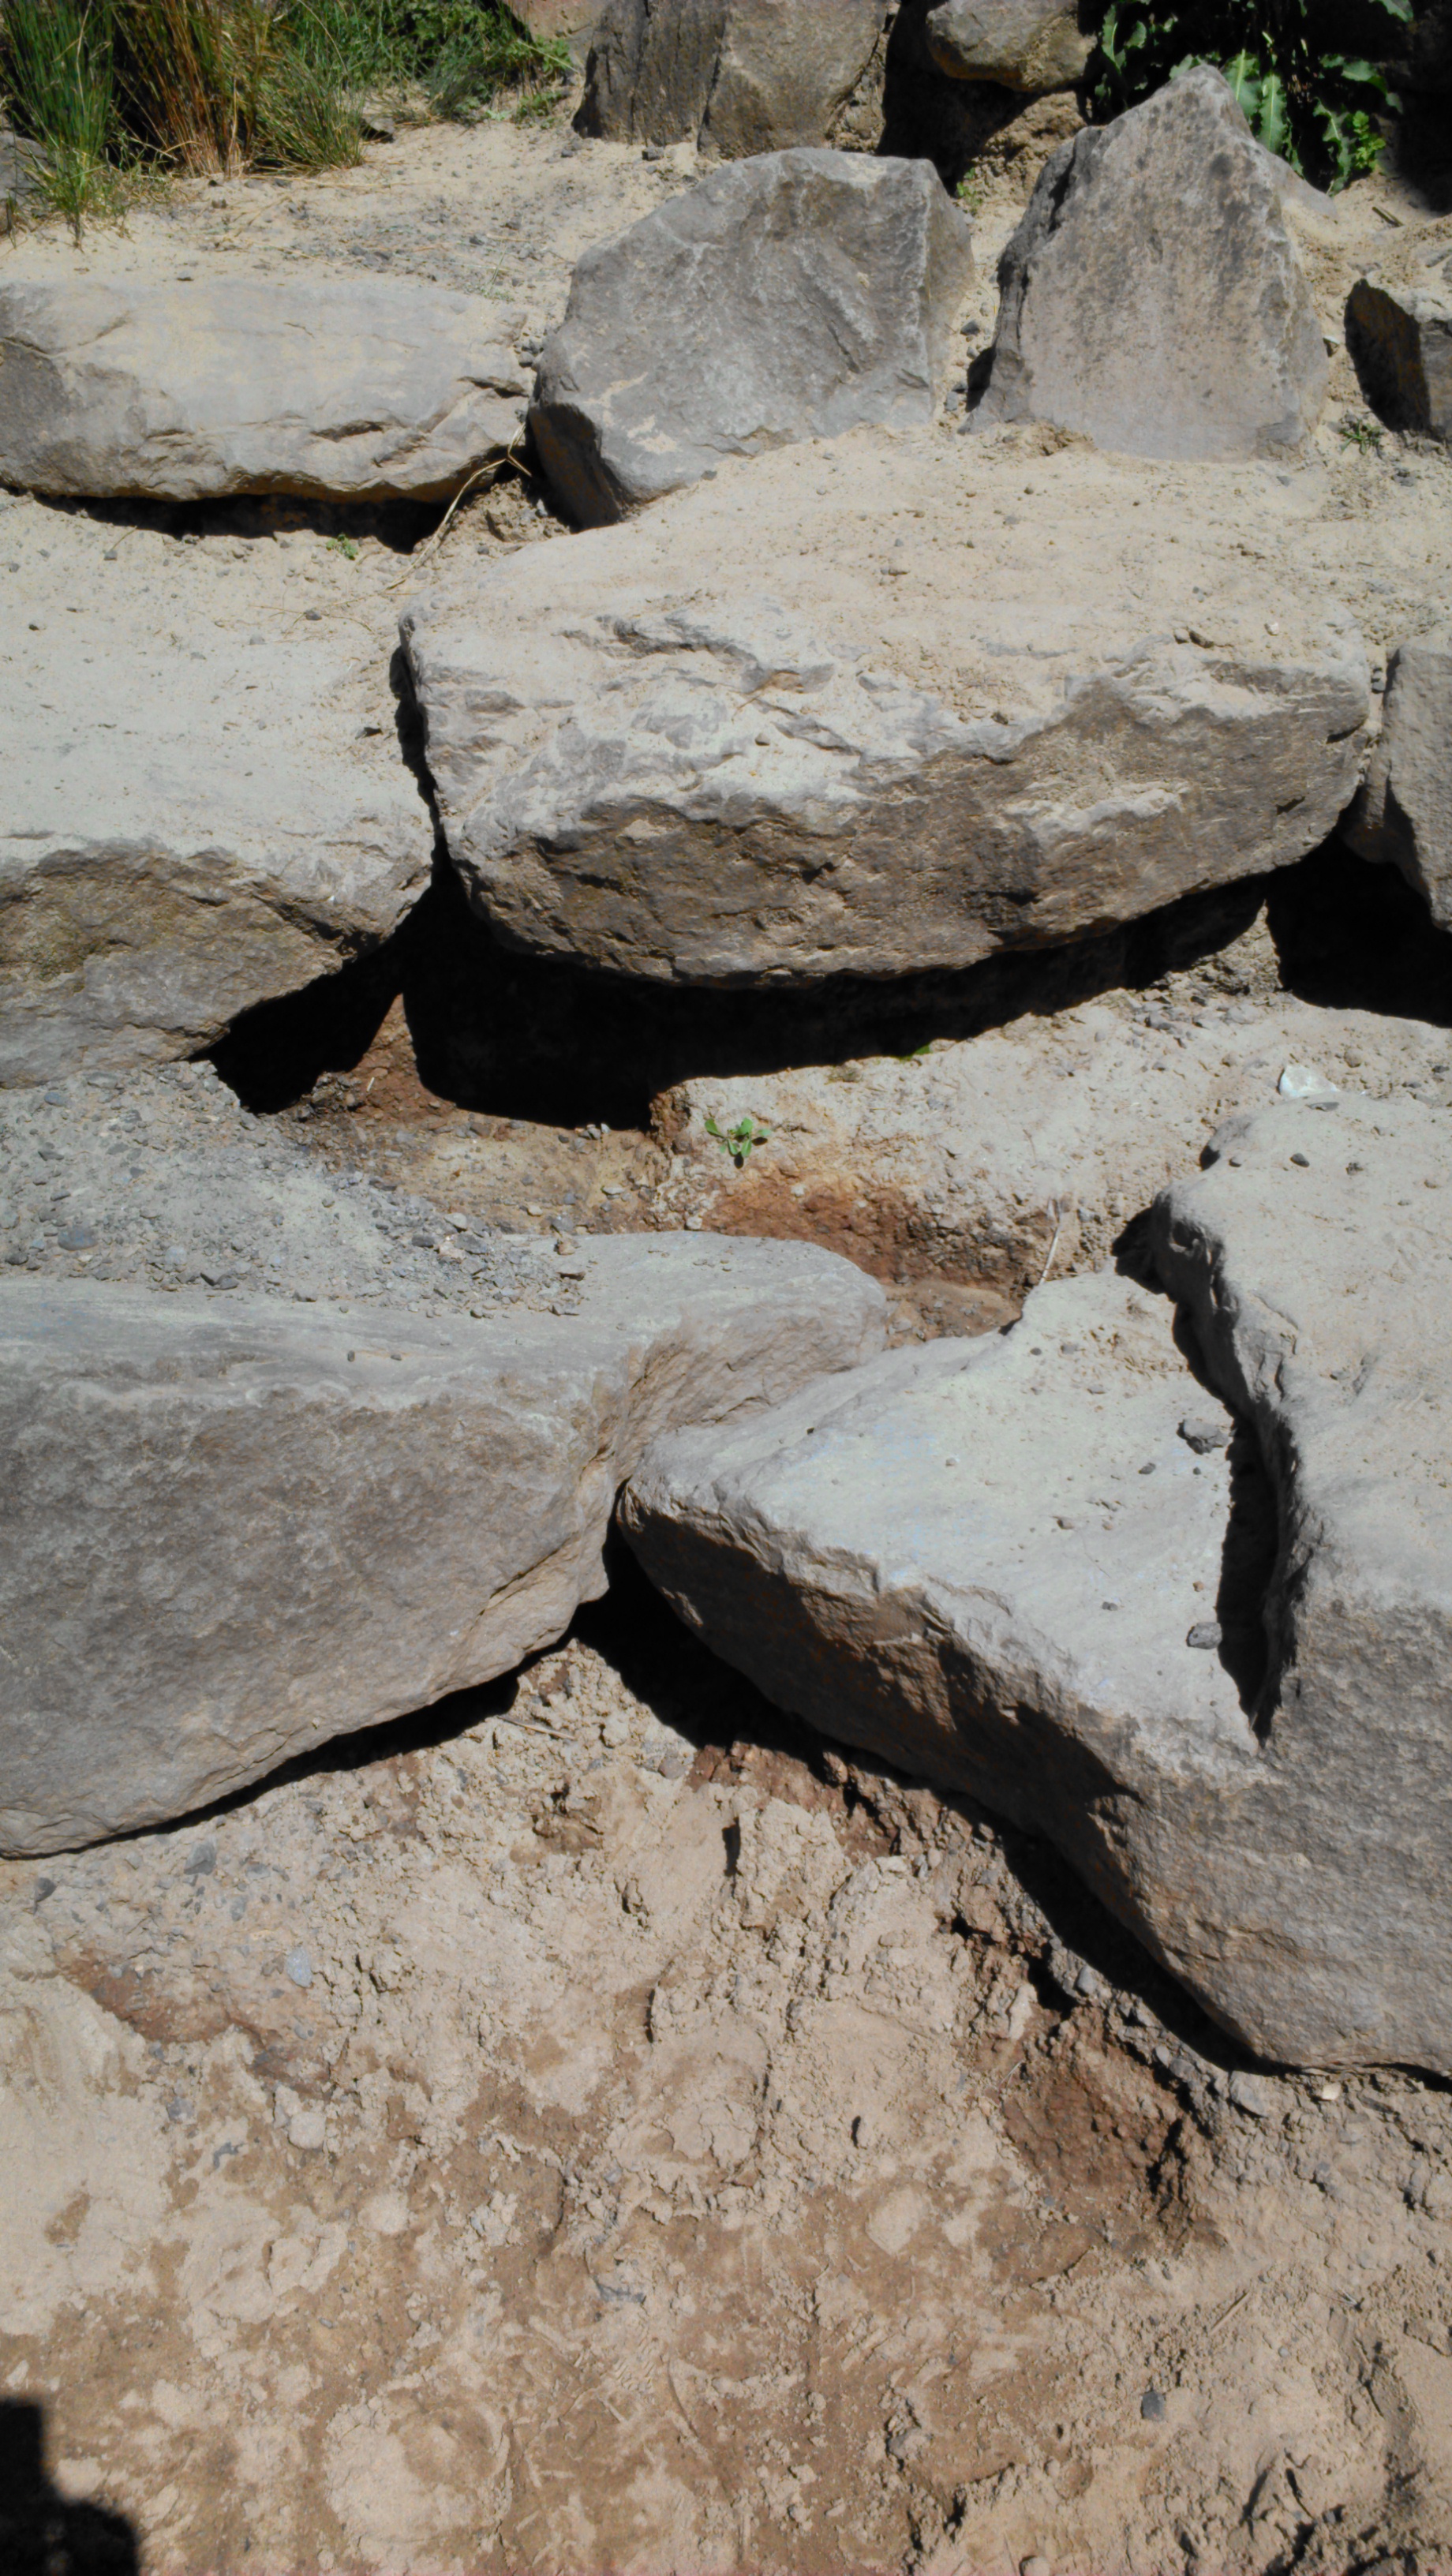
The channel has an earthen bottom, no concrete or additives. This worked fine for most of the channel and allowed kids more freedom. But, erosion happened near the outlet of the water tank because of the pressure and between a few of the tight rocks where we planned water falls. Later concrete channels were added in both of these zones. Below you can see the worst of the erosion. It was not really bad, but we wanted to keep it from getting worse and allowing the big boulders to shift or move.
Boston Nature Center : Dry Streambed
This process and photos were outlined on the Playscape Blog by Erica Quigley. You can see the entire post here.
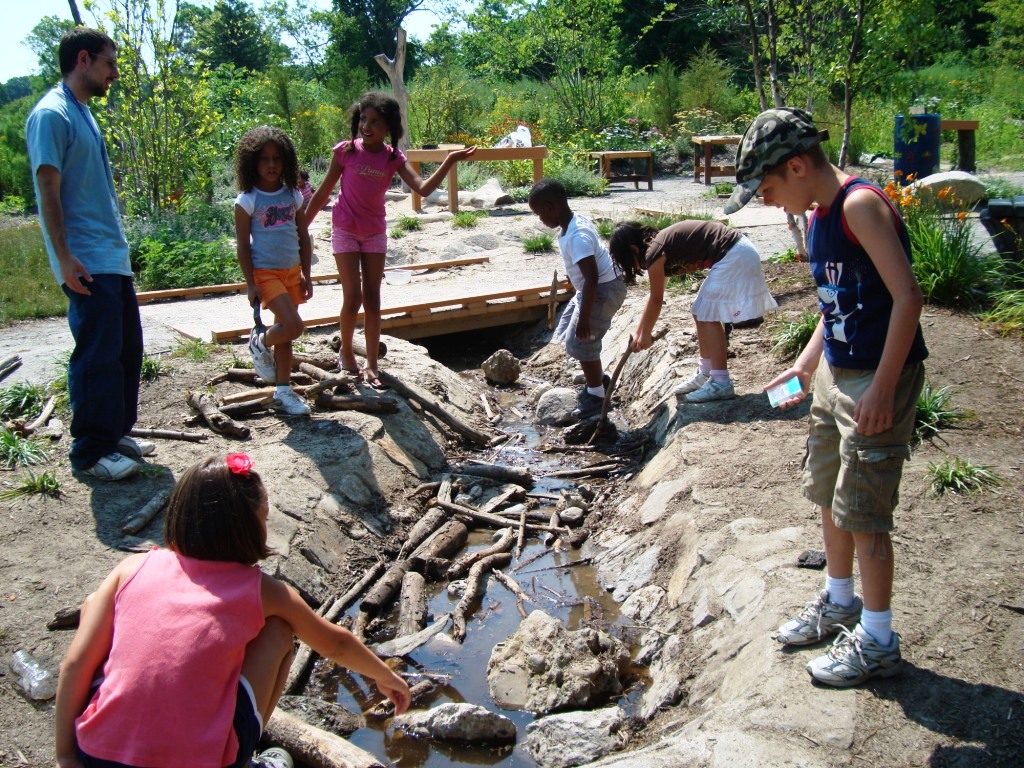
“The design drawings showed a dry streambed lined with stones, and the builders created an elegant, nature-inspired feature. The builders set rounded stones into the bottom to suggest places for children to build dams. They also made the stream narrower as it turned a corner, to help the water pick up speed.”
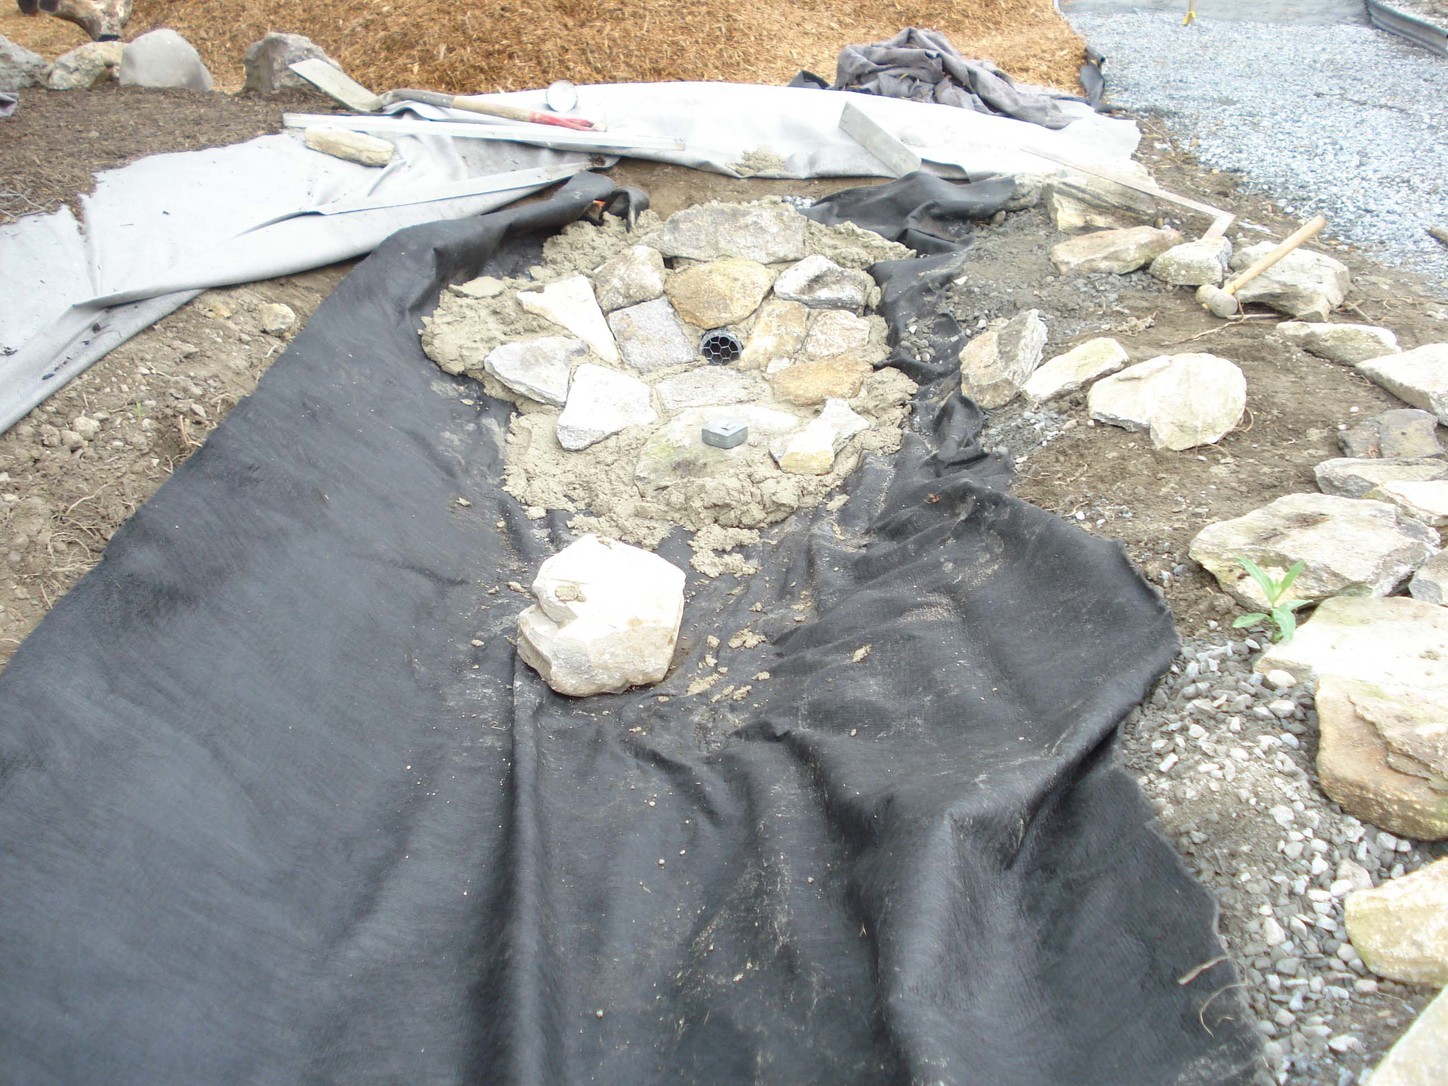
“Large, flat stones were set in concrete. The drainpipe was covered with chicken wire to keep out larger objects (sticks). We later put a finer screen on, which soon clogged. We wanted kids to put sand in the stream – that’s why the sand area was placed next to the stream – but weren’t sure how to keep sediment from building up. After the first two years, the dry well likely filled with sediment and stopped draining the stream. When mosquitoes would appear, a staff member would siphon out the water; an easy task since the rest of the site has enough grade to draw water lower. Ideally, we would have planned a trap that could be cleaned out periodically.”
“Having flat stones along the bank was really key in reducing erosion. This section is quite wide and is a favorite spot for kids to test their mettle jumping across. Upstream, it’s not as wide, so younger kids can challenge themselves, too.”
“Here’s the other side of the rain barrel. The final version has a permanent hose fitting on a sturdy post. We bring down a small hose and leave it nearby in the warmer months. It’s a flexible solution; staff can fill the rain barrel, water plants, or spray down the kids as needed.”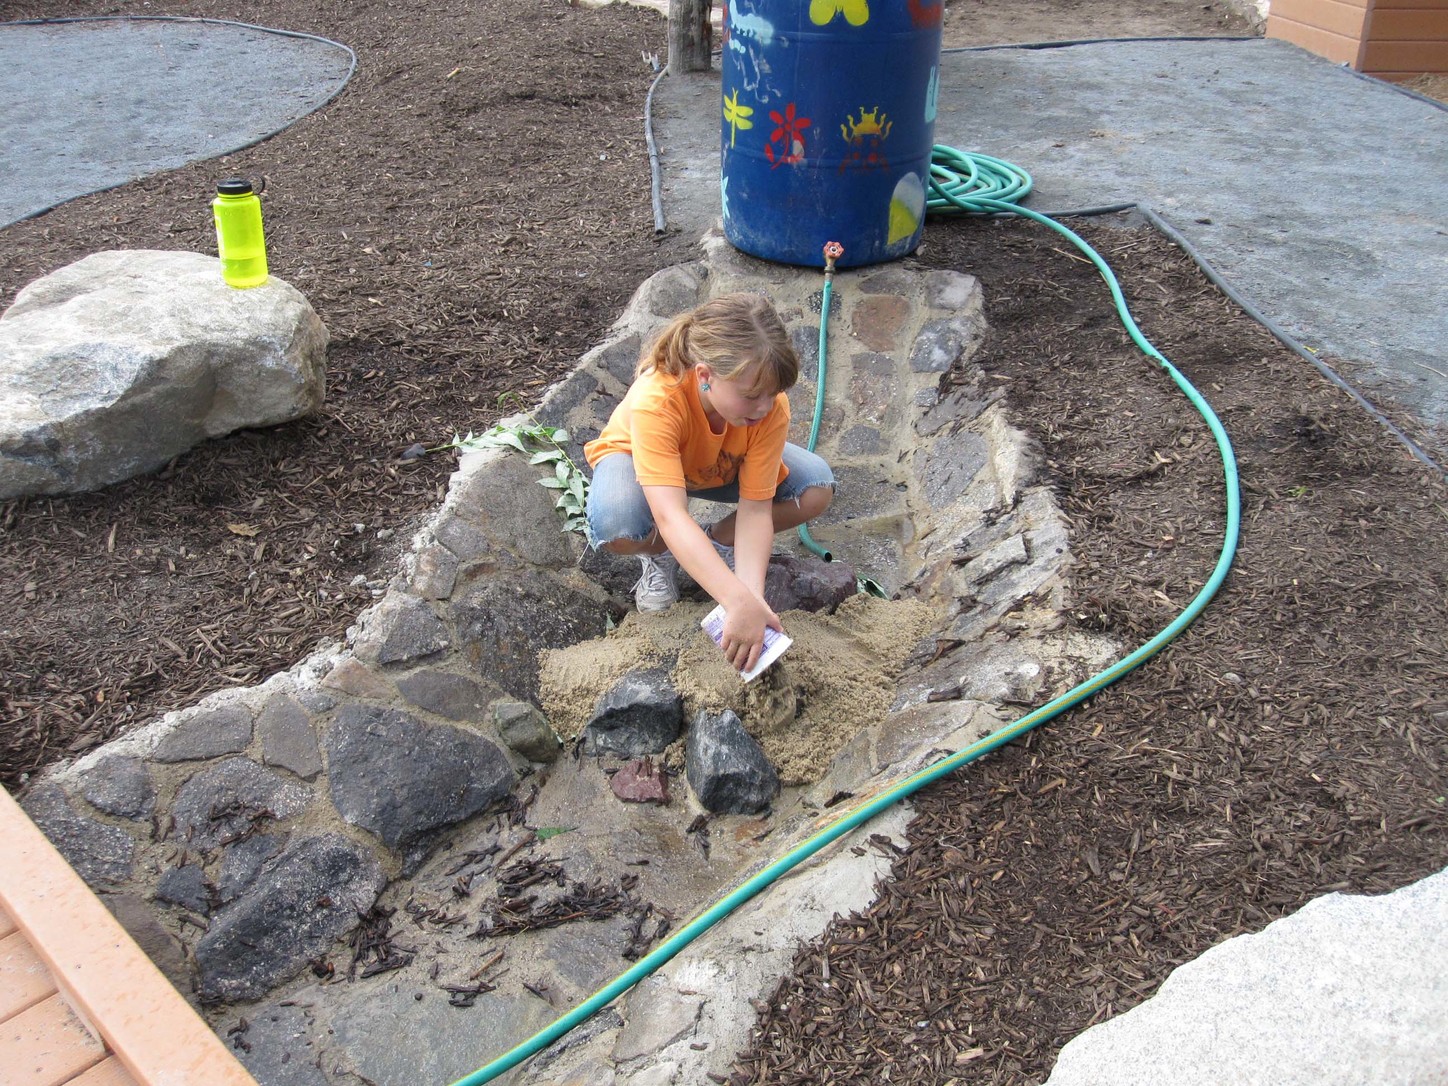
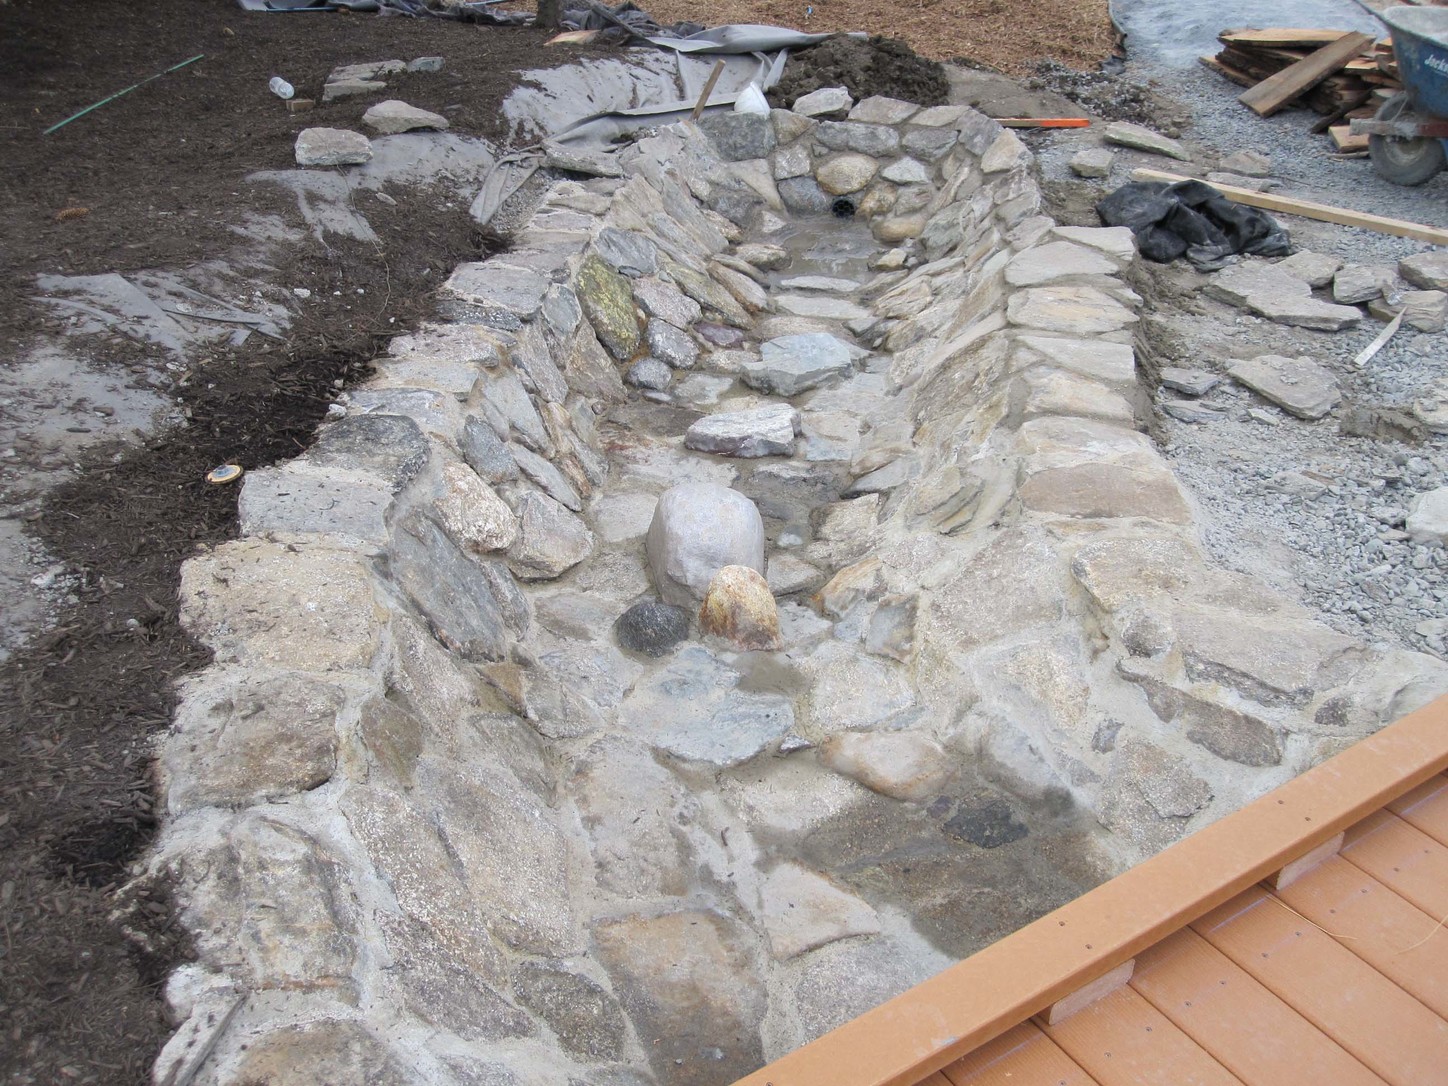
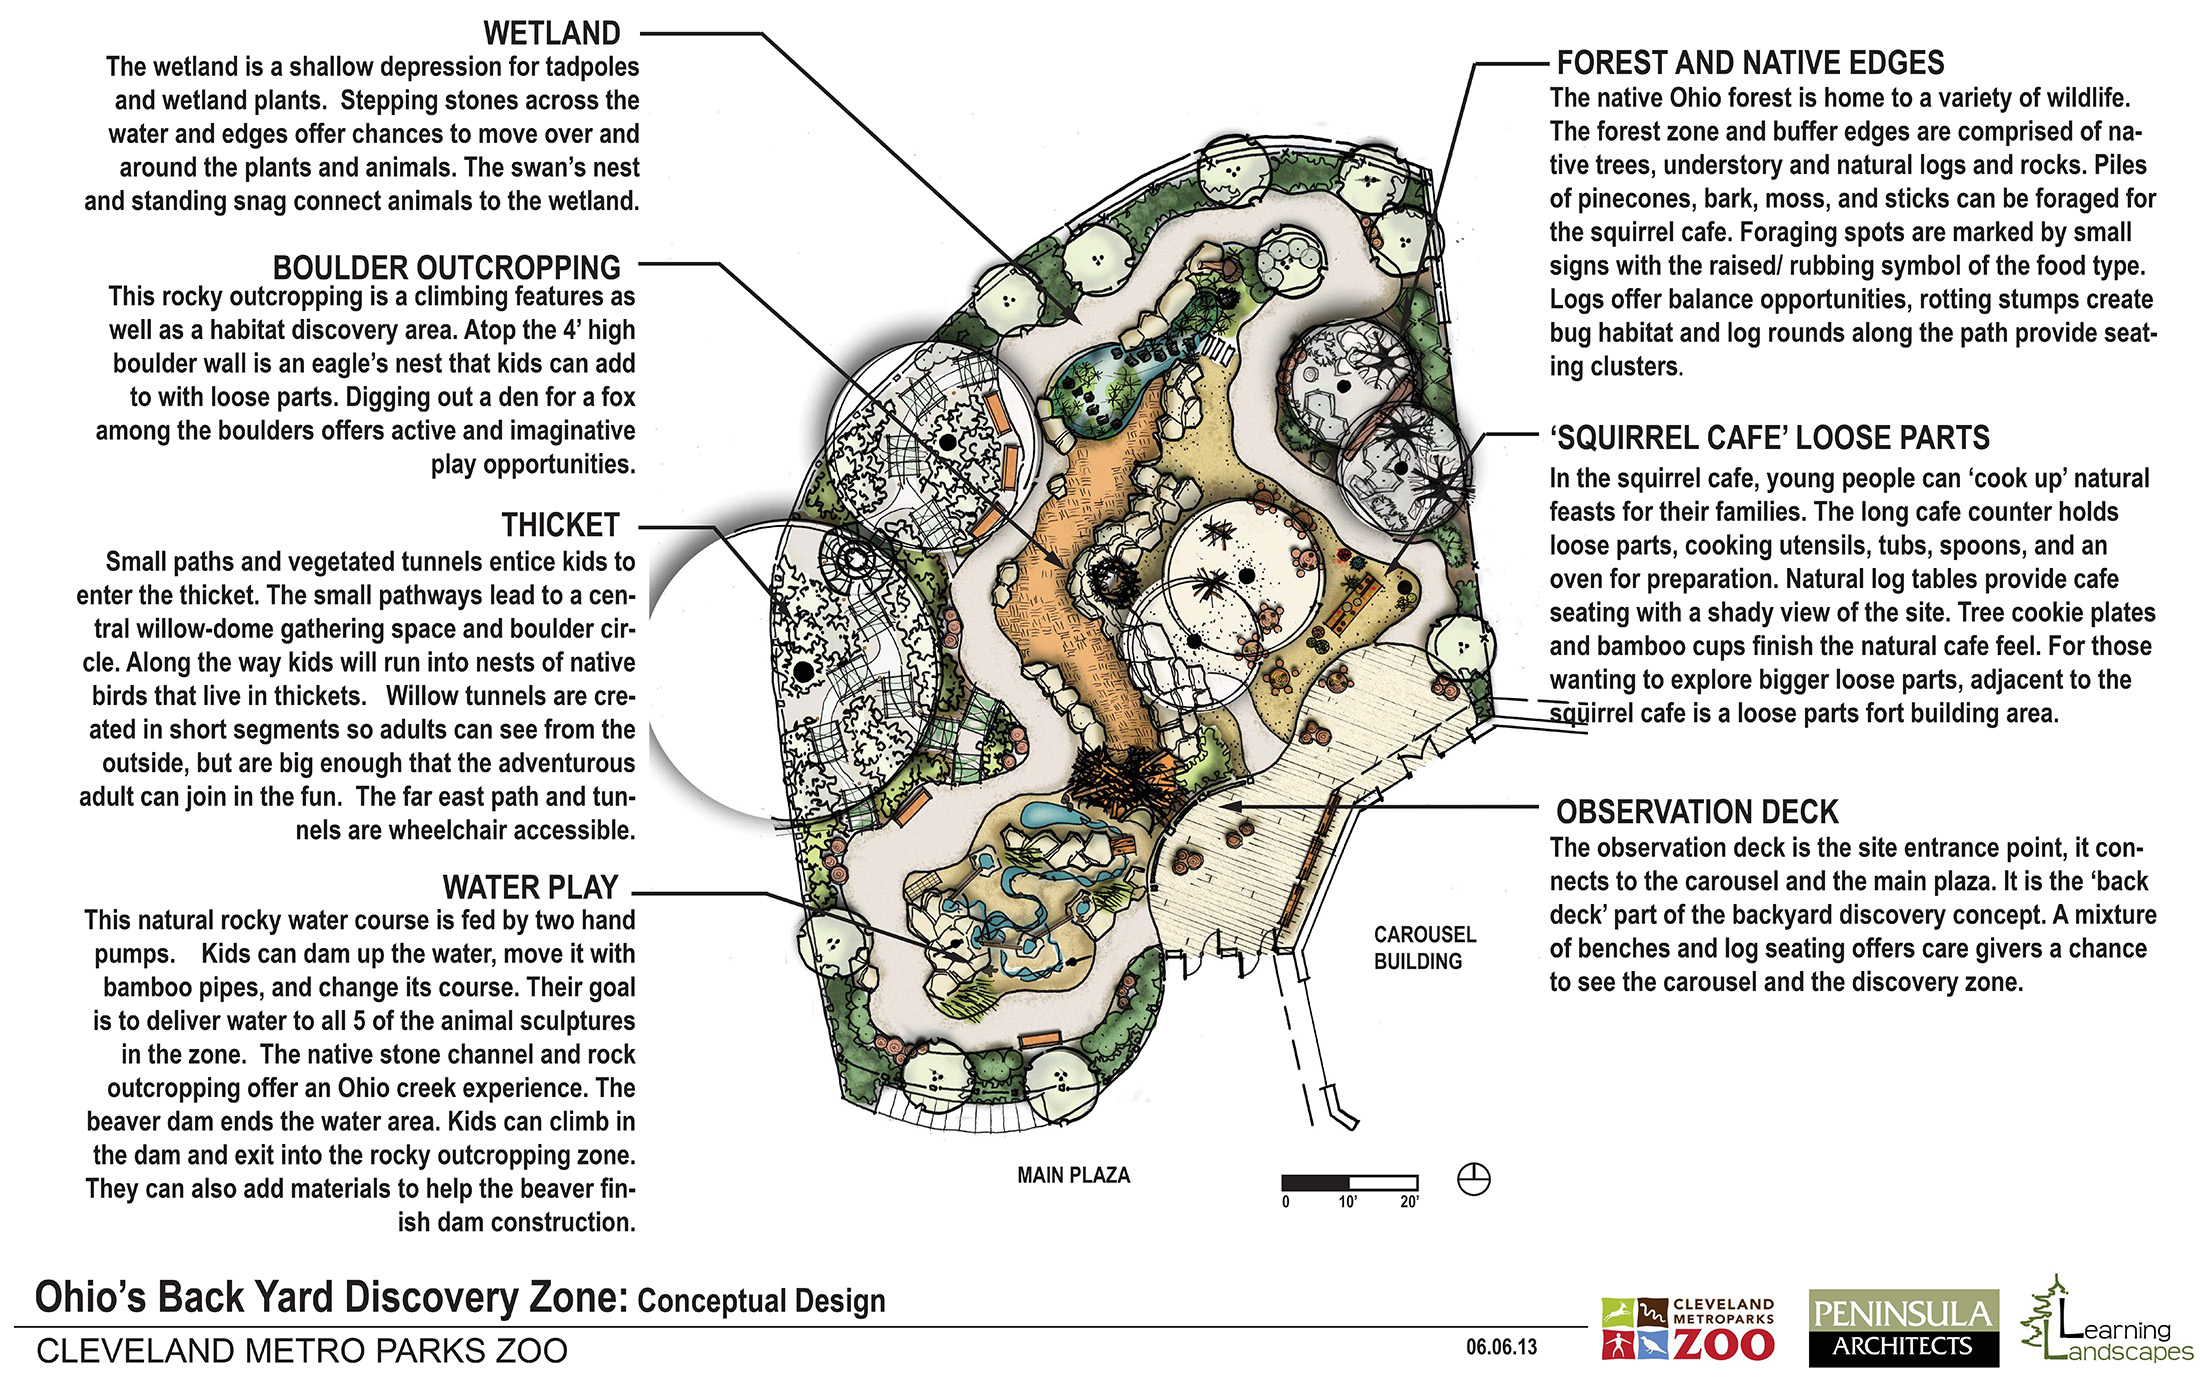
Cleveland Zoo Discovery Ridge : Water Play Feature
The Discovery Ridge at the Cleveland Metro Parks Zoo was designed to provide kids with fun ways to see how local animals get food, water, and shelter. This site receives lots of traffic and no staff member is assigned to watch the discovery area. With this in mind, the water play area was created to be tough, safe, and very interactive. Here is the overall site plan. You will see the water play area in the bottom left.
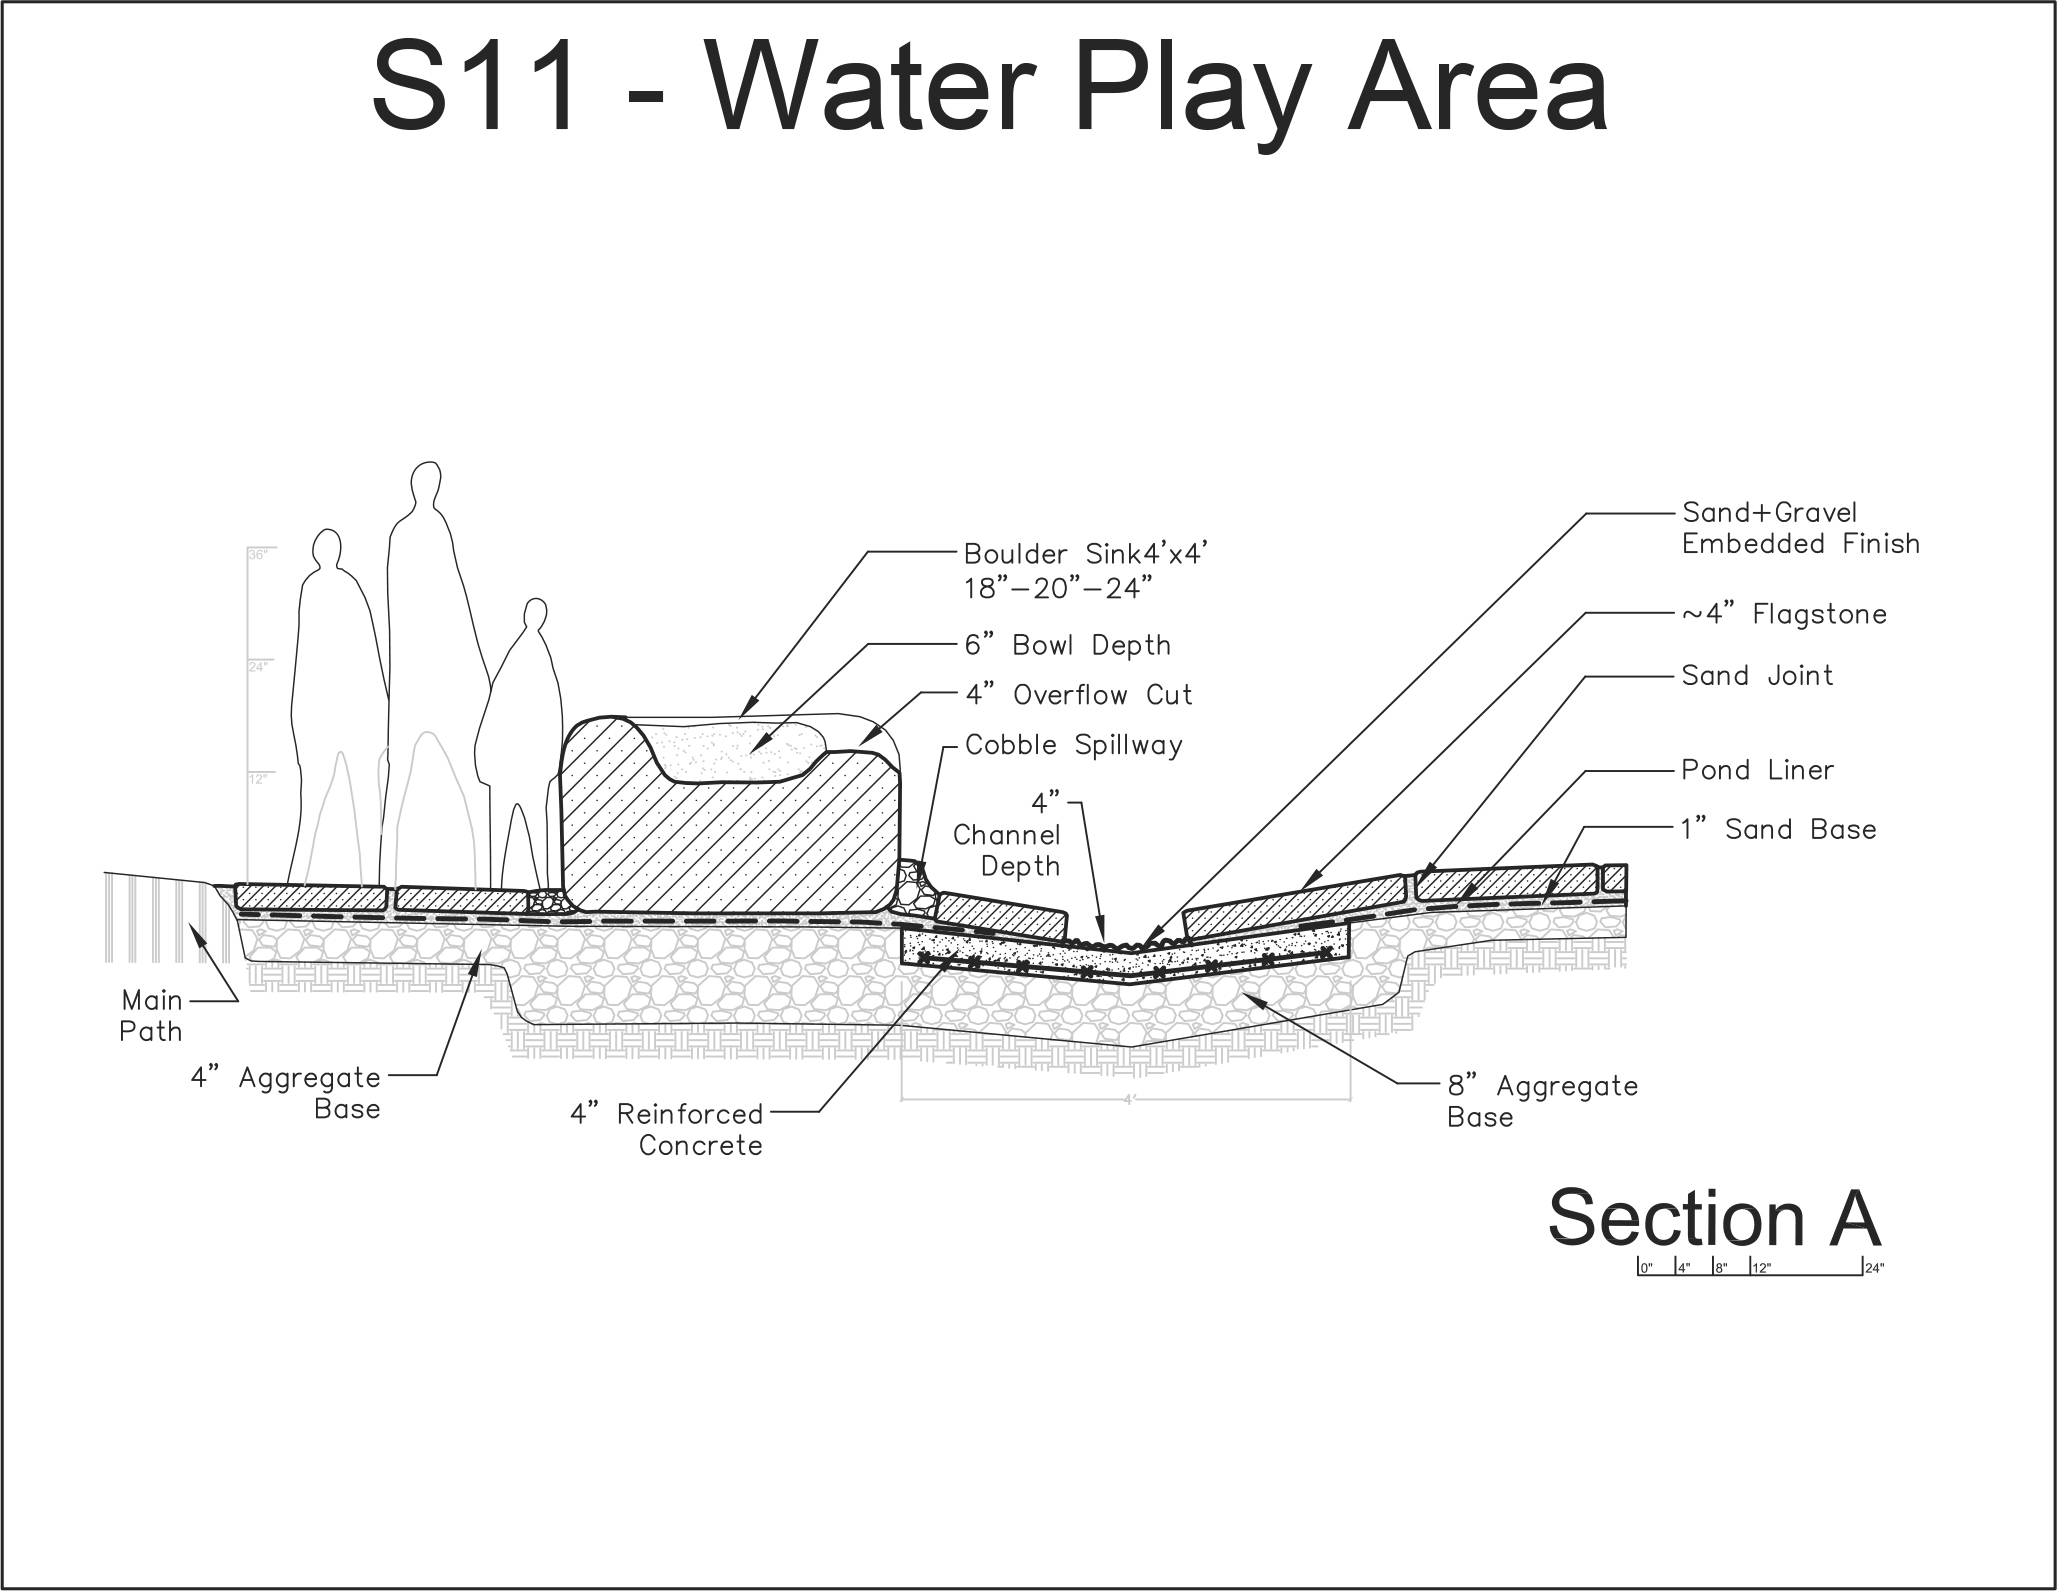
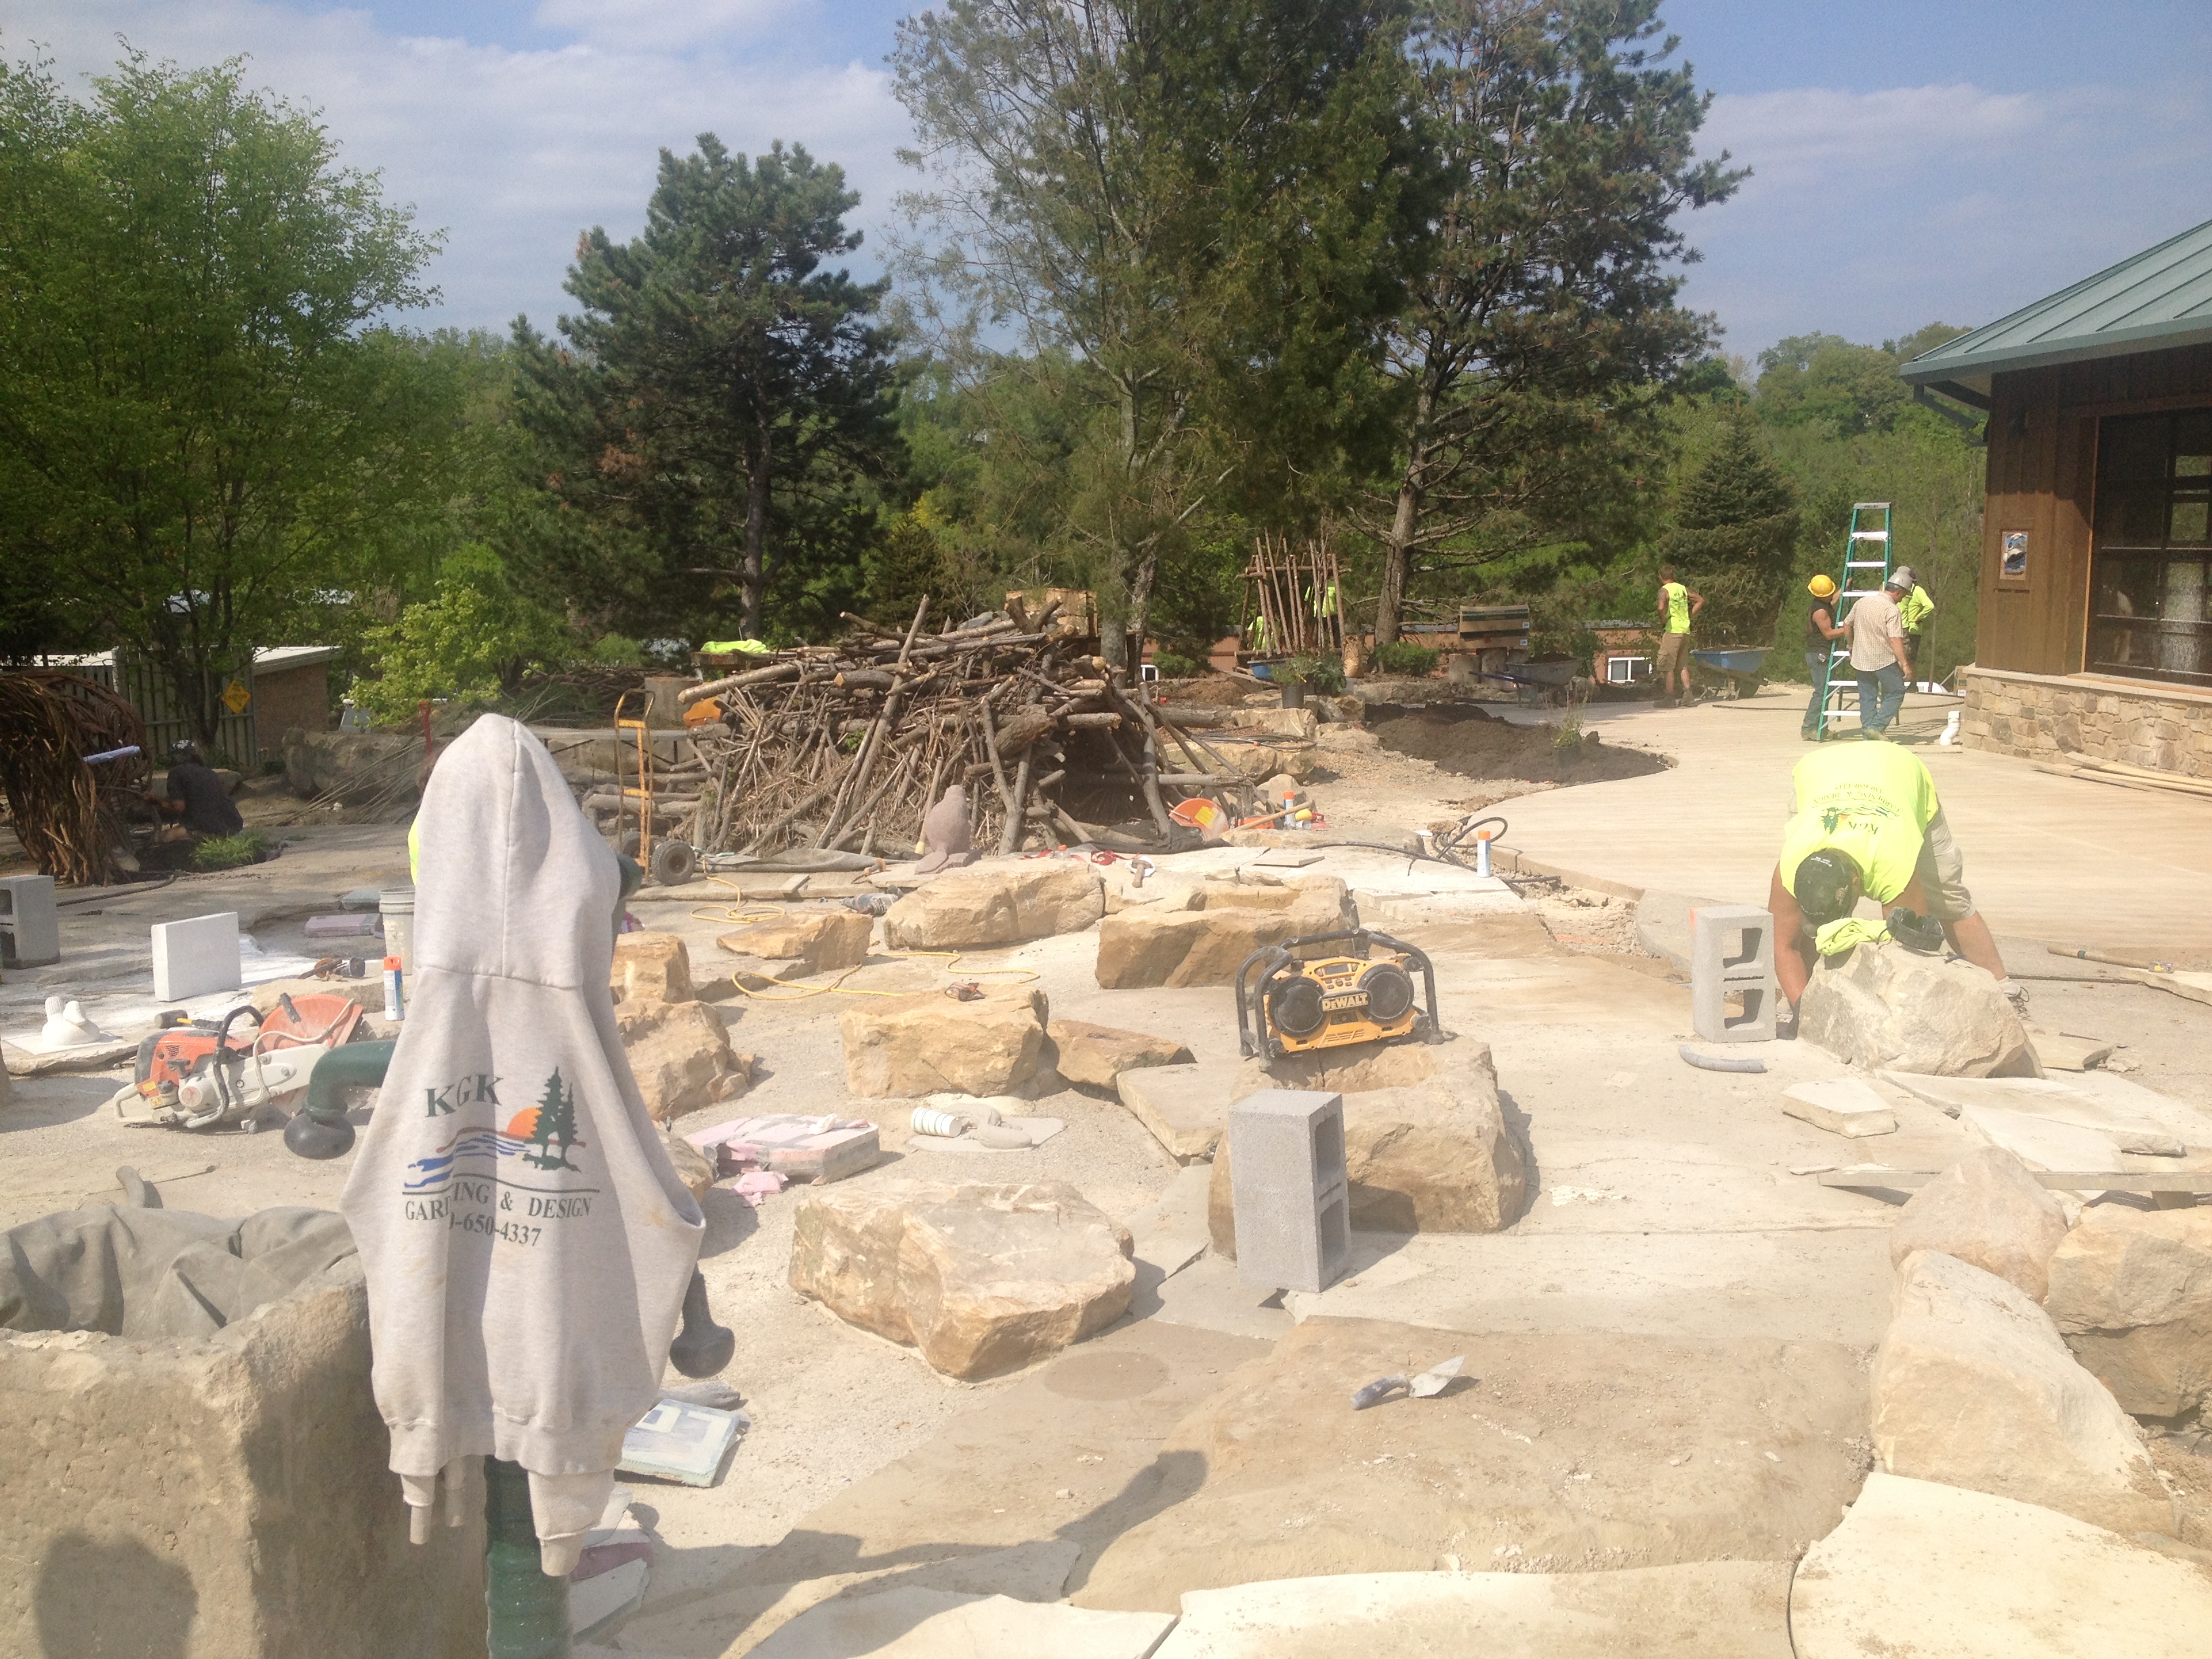
It helps to have a great contractor that is on board with the vision and that understands the concepts behind the design. On this project Hummel Construction and KGK Gardening and Landscape filled that role well. Here is the detail for the construction of the water play area. The channel is a combination of concrete with stone to make it look as natural as possible. A liner was added to capture any water that seeped through the cracks.
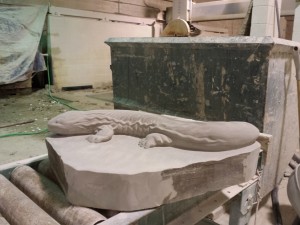
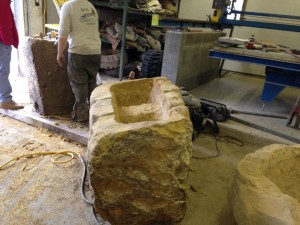
Since construction started in the middle of winter some of the features were constructed in the shop before site work started. Below is one of the stone animal sculptures and one of the stone sinks that can be filled with water.
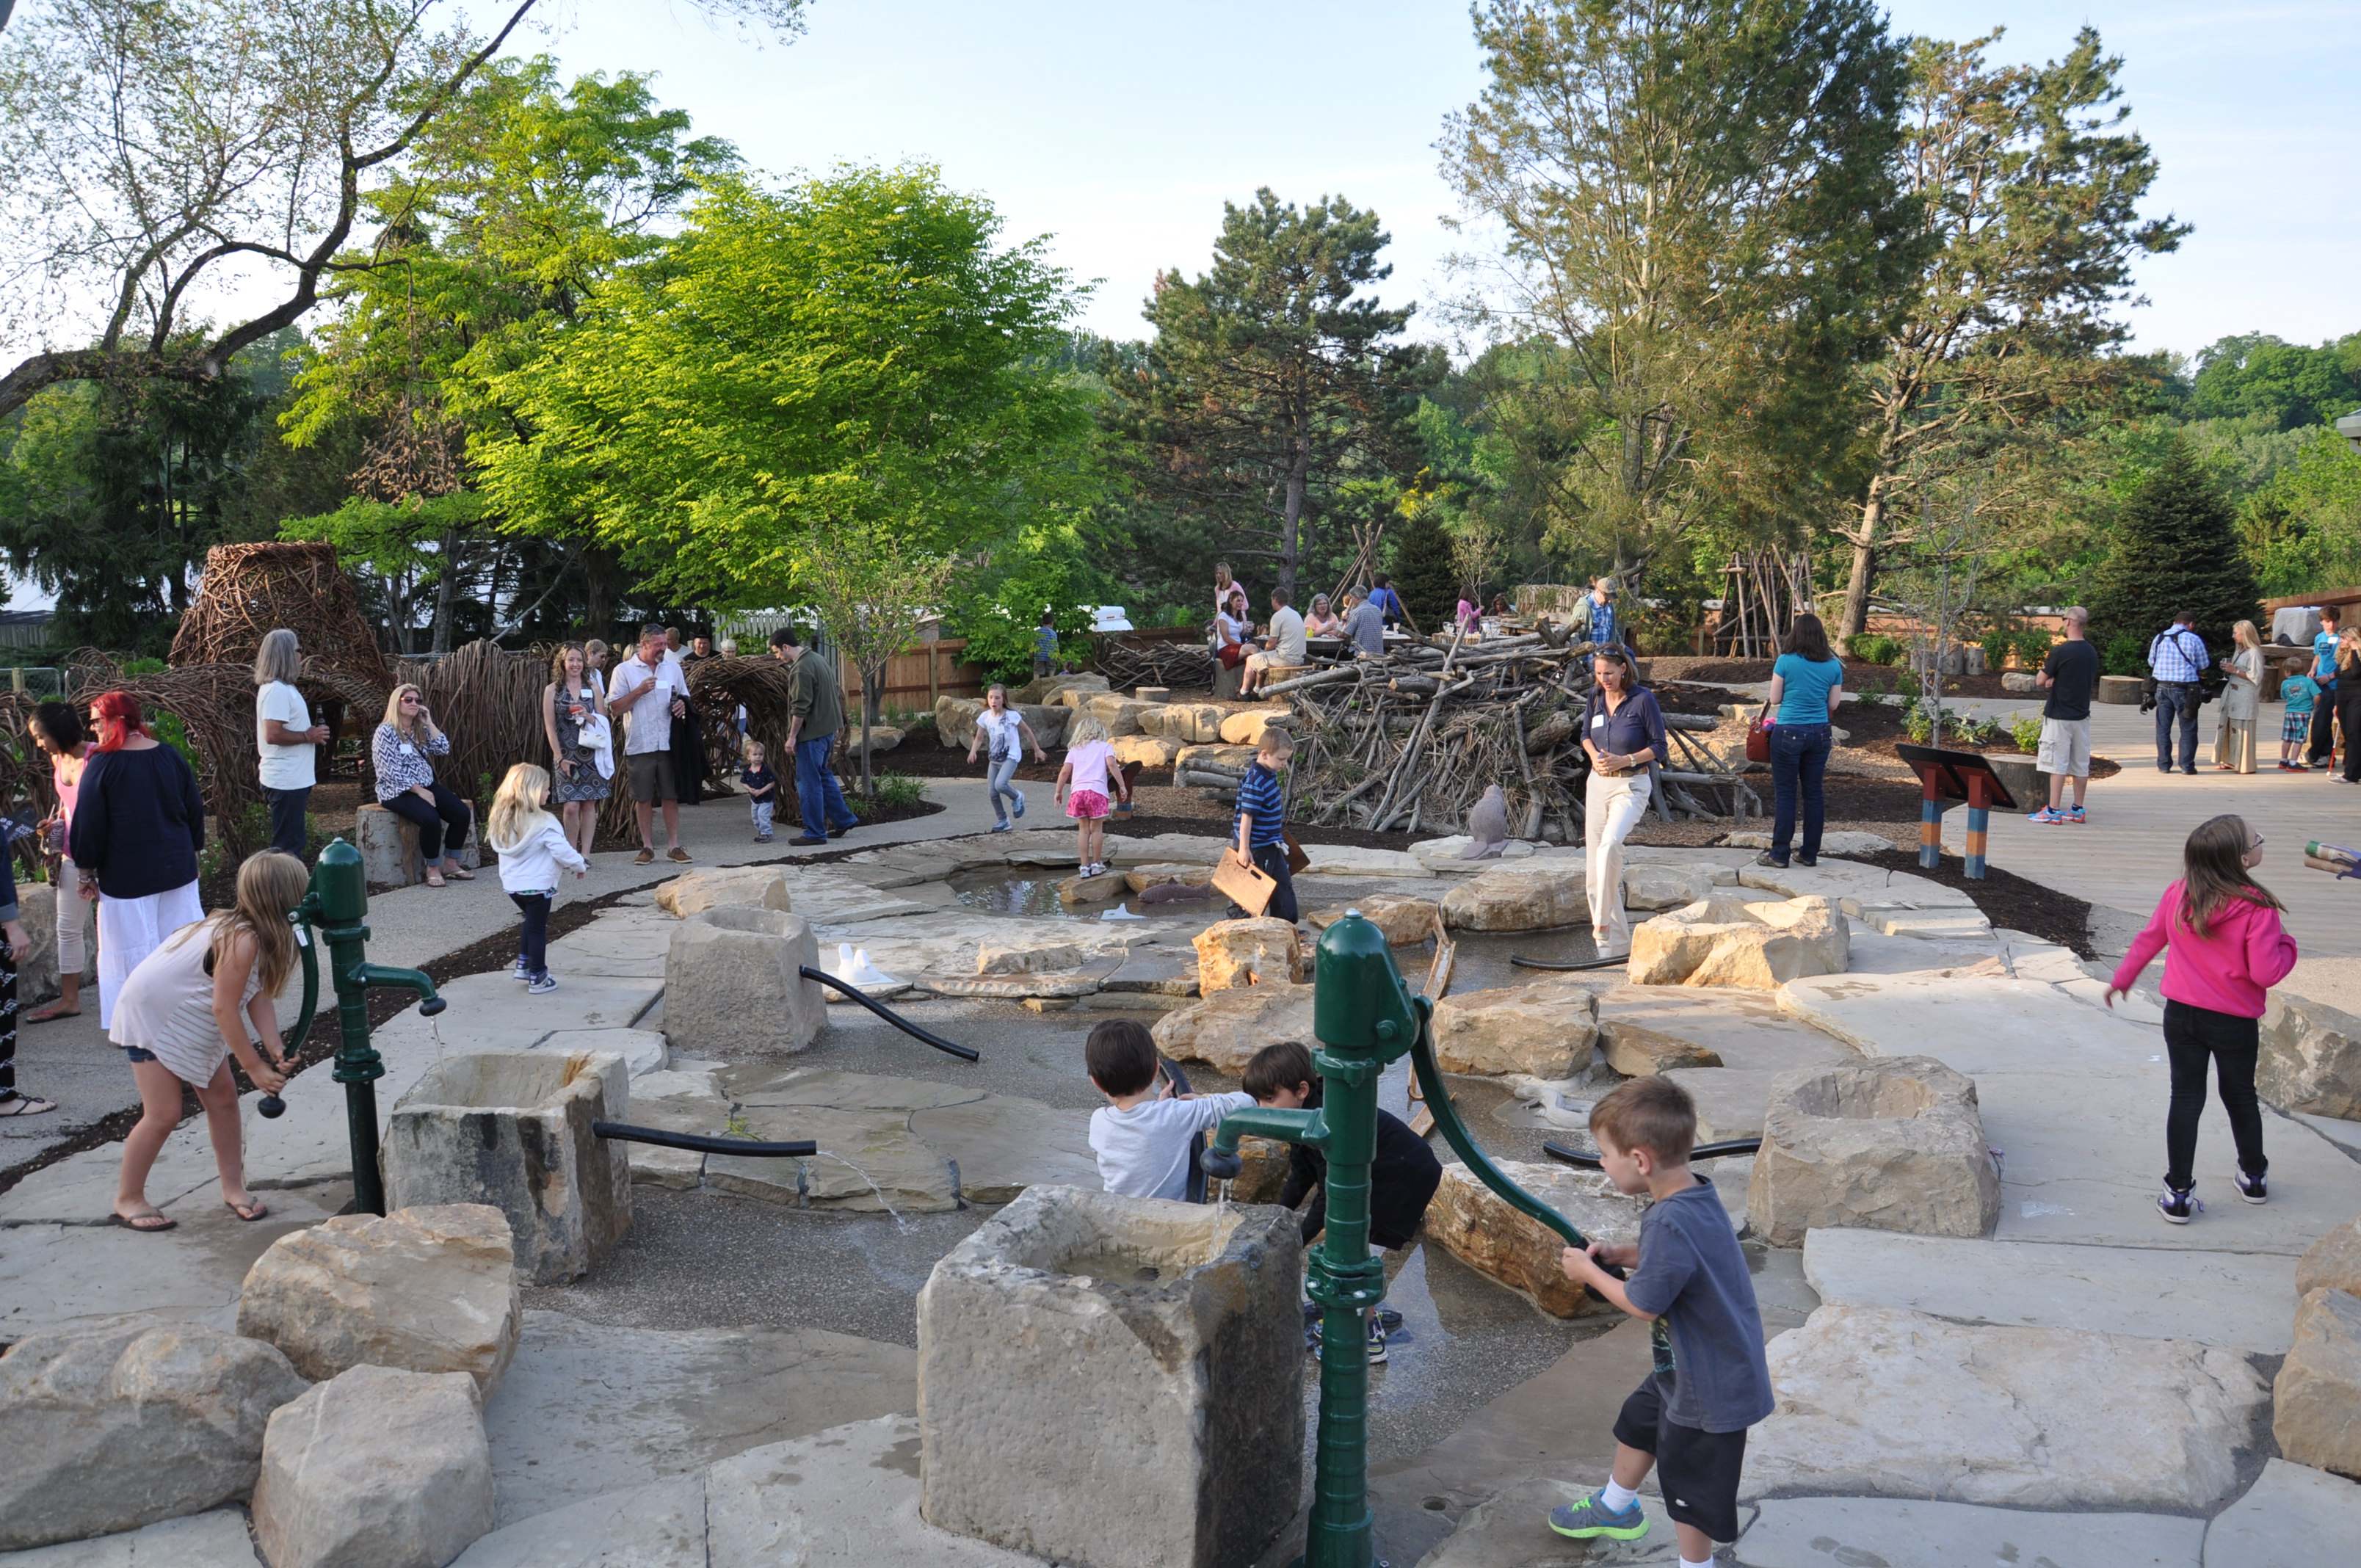
The water pump was installed to pump water into the area. It helps limit the amount of water that is used and gives kids an extra physical workout. See my post here on pumps and water play for more on the pump. This water is reused in a site wide rainwater harvesting system. Water is collected at the end of the water channel, treated and used for irrigation in the Zoo’s many landscape areas.

The final feature is a hit! The kids love using the bamboo channels to move water around and everyone needs a turn on the water pump!
Conclusions
Sand and water play can be done lots of different ways and have lots of different results. The three examples are all different scales of development and had unique approaches. The most important factors to consider when deciding how to construct your sand and water feature are:
– How much use will the site have?
– Is it open to the public or on a more restricted site like a school with a fence?
– Will there be a full time attendant watching the area? What type of supervision will be provided?
– How much time or energy can be spent on maintaining the area?
Smaller, mostly private sites like Opal school can use a lighter touch in construction. Giving kids more freedom to shape the channel and reducing the cost. Kids at the school will also play here repeatedly and have an ownership of the site that brings more care during play. More public sites like the Cleveland Zoo may see a thousand kids on a heavy use day. These kids may only play here once and are likely to be rougher and move faster, the design needs to account for that.
Whichever approach you take, sand and water play will provide many opportunities for kids to flex their physical and mental muscles as they play. Creative problem solving, cooperation, and extended focus in play will surely follow. If you are considering a sand and water play feature and need some help, let us know. We are happy to have you benefit from the many lessons we have learned along the way!
Michelle
michelle at learning landscapes design dot com